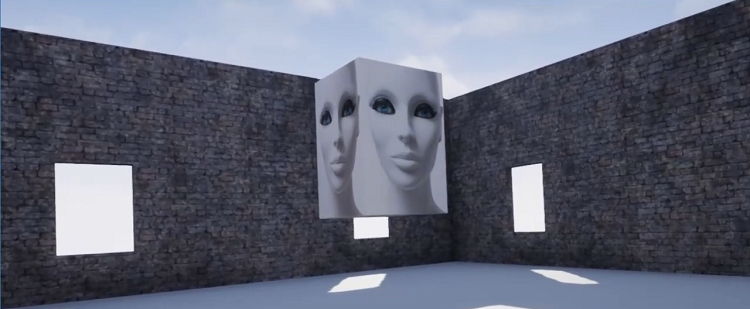
Figure 1. Initial VR store assistant appearance.
Introduction
I began working with Virtual Reality (VR) through the Intel® Software Innovator program a month or so ago, after working mostly on Internet of Things (IoT) and AI projects since January 2017. Earlier this year, I submitted an idea based on one of my previous commercial projects that is now open source: retailAI. I received a new beta release of the Oculus Rift* developer kit from Intel to work on my idea and take it to the next level. This proof of concept (POC) will demonstrate an artificially intelligent virtual store assistant you could talk to for assistance in finding virtual products. The proposal includes combining VR, natural language understanding, voice synthesis, voice recognition, and IoT to create a virtual AI that can communicate through speech and hearing.
This is the first article in a series that will take you from a completely blank VR canvas to a fully functioning AI that can provide product information and display virtual products on request. It documents my initial steps in creating my first VR project using an Unreal Engine* 4 and an Oculus Rift* to create a functioning VR store assistant with artificial intelligence. The project is a work in progress that will be updated regularly.
Getting Started with VR
Getting started with VR is not as difficult as you might think. Many companies are creating assets and templates that can have you up and running quickly, breaking down the barriers to entry.
This project includes voice synthesis using Microsoft* speech application programming interface (SAPI), which allows the AI to speak to you. In later code pushes, speech recognition will also be integrated, with communication handled by a natural language understanding (NLU) engine I recently open sourced.
Software Required
- Unreal Engine* 4, this project used version 4.19.2
- Microsoft Visual Studio* 2015
Hardware Required
- VR-ready computer system
- Oculus Rift*
What Will We Make?
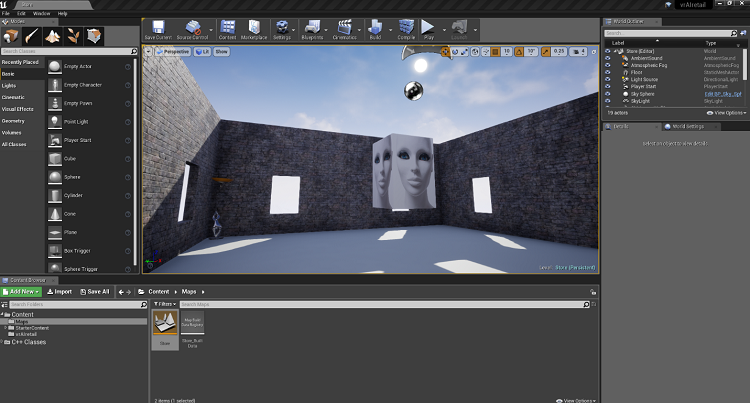
Figure 2. Unreal Engine* 4
The project uses the iotJumpWay platform allowing you to communicate with your own back-end applications and ordering systems using MQ telemetry transport (MQTT) and APIs. The following steps will take you through the required tasks:
- Install required software
- Clone the repository (optional)
- Create an Unreal Engine 4 project
- Add starter content
- Create a room
- Create an actor
- Add Speech Synthesis
- Resolving the SAPI issue
Step 1. Install required software
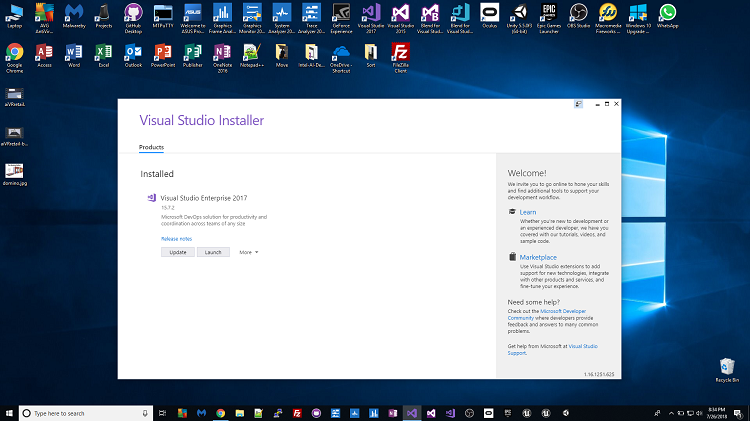
Figure 3. Installing Visual Studio* 2015.
Install Unreal Engine and Visual Studio 2015. (For this project, be sure to use the 2015 version.) In addition to Visual Studio, install the C++ extras as well.
Step 2. Clone the repository (optional)
Download the full code by cloning the repository linked below to your development terminal.
Note: This is my first time sharing an Unreal Engine project to GitHub*, so if anything does not work, please alert me via the repository’s issues section below.
Navigate in command line etc. to the directory you wish to download, and enter the following code into your command line; this will clone the repository from the GitHub repo in a directory you choose:
$ git clone https://github.com/iotJumpway/Oculus-Examples.git
When the repository has downloaded, locate the project files in Oculus-Examples/Rift/vrAIretail.

Figure 4. Location of project files on GitHub*.
Step 3. Create an Unreal Engine* 4 project
Create a new Unreal Engine 4 project. Use the Basic Code template, as shown in figure 5 (below).
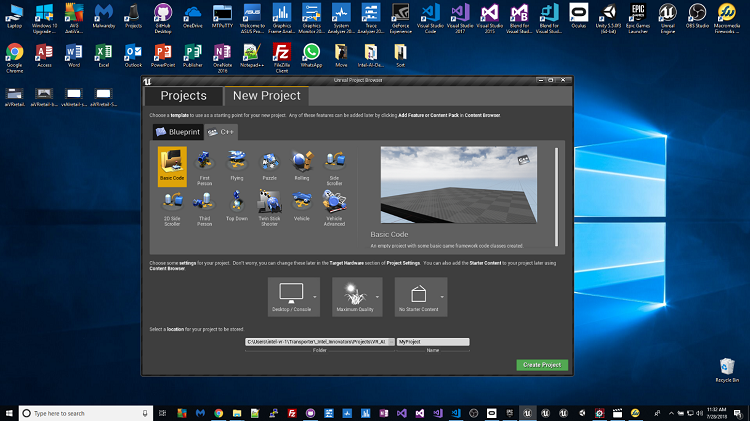
Figure 5. Start creating your project using the Basic Code template in Unreal Engine 4.
Step 4. Add starter content
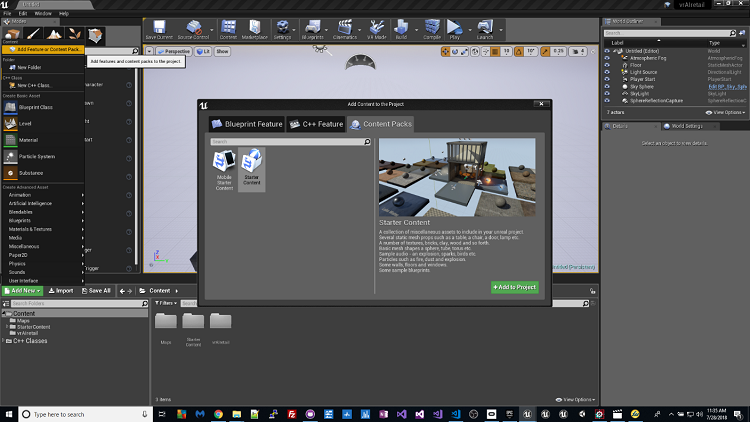
Figure 6. Importing the starter content.
I decided not to begin with starter content but to import it afterward. In my experience, importing the starter content at this stage resulted in lots of stuff that would never be used in the project. I found it better to create the project and then import the starter content.
- Click the Add New button in the Content window in Unreal Engine.
- Select Add Feature or Content Pack.
- Select Content Packs and Starter Content.
Step 5. Create a room
The video below describes how to use the Unreal Engine starter content to create a room.
After following the above tutorial, you should end up with a completed room. The screenshot in figure 7 shows the beginning stages of a yet-to-be-completed room.
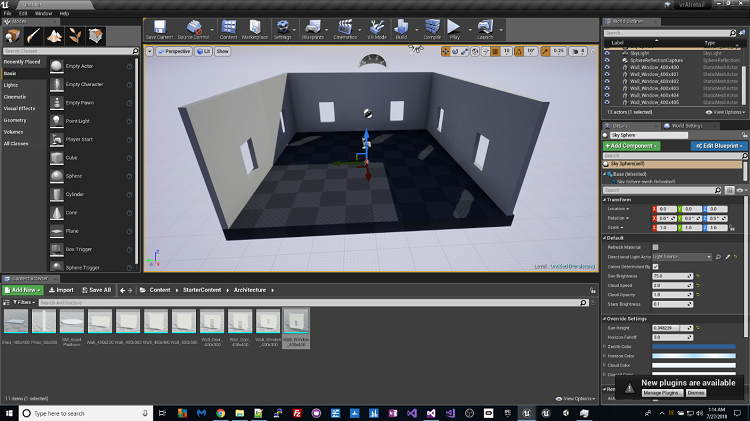
Figure 7. Yet-to-be completed room.
Add flooring and paint/decoration to the walls using materials in the Details section of the UI. (See figure 8.)
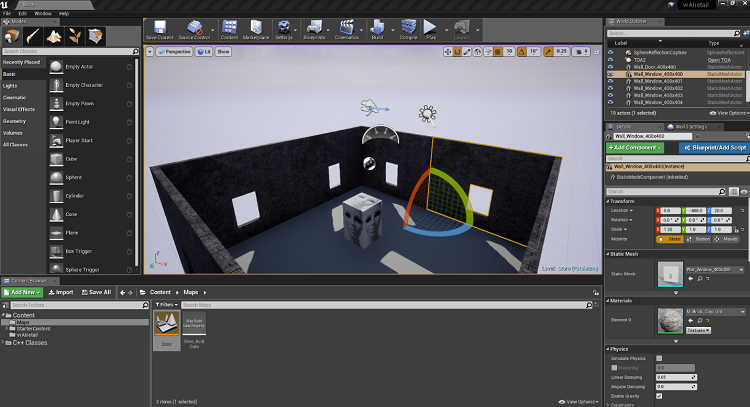
Figure 8. Adding flooring and paint/decoration to the room.
Step 6. Create an actor
For our store assistant we will use an Unreal Engine actor, an object that supports scale, rotation, etc. For more information, check out the UE4 docs.
Now right-click in the Content area and select New C++ Class. Select Actor as shown in figure 9 and complete the steps to create the actor.
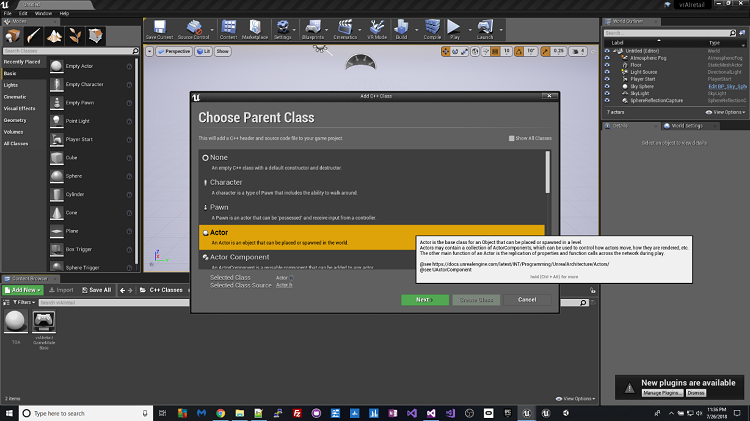
Figure 9. Creating an actor in Unreal Engine.
Once you have created the actor, Visual Studio 2015 opens. This provides access to the C++ source code for your project and actor, as shown in figure 10.
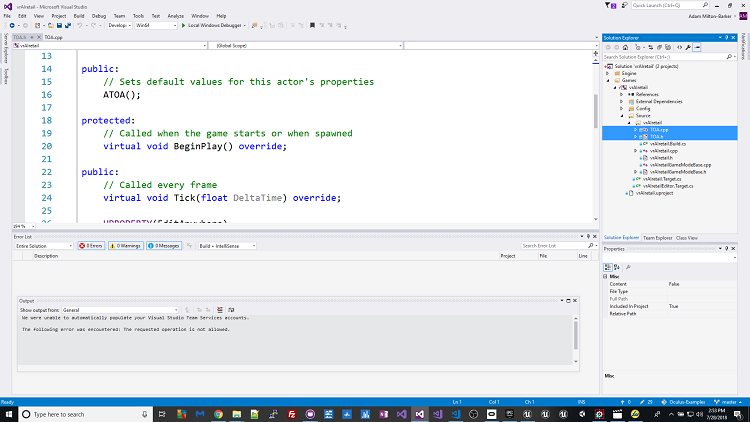
Figure 10. The source code for the actor in Visual Studio 2015.
I created the actor labeled TOA. You can access the two actor files (highlighted) on the right-hand side of the screen, and hyperlinked here TOA.cpp and TOA.h.
The code in these files makes the actor spin. This spinning Actor will be the store assistant.
Add the code from TOA.cpp and TOA.h above into your own actor files, making sure to replace any project-specific information with your own. If you copy and paste the code exactly, you will also copy references to my project name, which you will need to replace with your own. For example, below is found in the top of TOA.h. In this file you will need to replace any reference to TOA, taking care not to replace ATOA; these must remain the same in both files.
#include "CoreMinimal.h"
#include "GameFramework/Actor.h"
#include "TOA.generated.h"
You should now have two newly modified files, TOA.cpp and TOA.h. Your new version of TOA.h should now look like the below code for example:
// Fill out your copyright notice in the Description page of Project Settings.

#pragma once

#include "CoreMinimal.h"
#include "GameFramework/Actor.h"
#include "TOA.generated.h"

UCLASS()
class VRAIRETAIL_API ATOA : public AActor
{
	GENERATED_BODY()

public:
	// Sets default values for this actor's properties
	ATOA();

protected:
	// Called when TOA has been created
	virtual void BeginPlay() override;

public:
	// Called every frame
	virtual void Tick(float DeltaTime) override;

	UPROPERTY(EditAnywhere)
		UStaticMeshComponent* TOAMesh;

	// declare our float variables
	UPROPERTY(EditAnywhere, Category = Movement)
		float PitchValue;

	UPROPERTY(EditAnywhere, Category = Movement)
		float YawValue;

	UPROPERTY(EditAnywhere, Category = Movement)
		float RollValue;


};
Go back to Unreal Engine and click and drag the Actor into the scene. Click Add Component and select Cube – you can then use materials, the same as you did for the walls and floor, to add an image for your AI. (See figure 12).
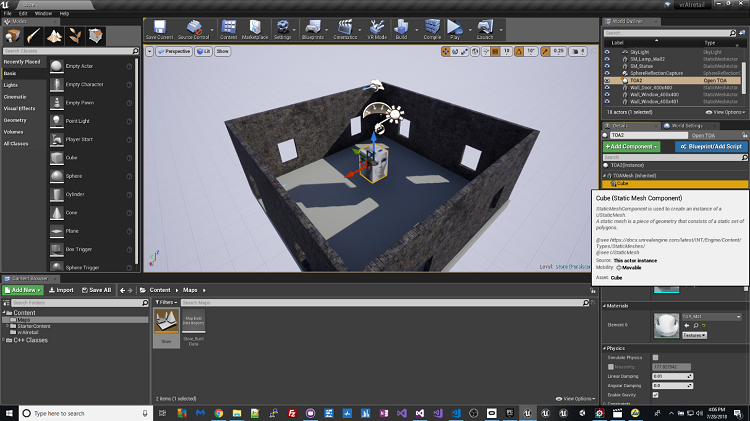
Figure 12. Adding a cube to the room in Unreal Engine*.
Step 7. Add speech synthesis
Microsoft SAPI is a popular speech synthesis and voice recognition tool. I have used SAPI in several previous projects such as my Arduino* World’s Largest Maker Challenge entry and my earlier Online Intelligent Systems Core and AI CPP programs. Having already used SAPI, I was aware of how to use it to program applications, but this was the first time I had noticed any issue with threads.
I found a few plugins that had previously been used by developers, but none were functional, so I set about creating my own solution using the experience from my earlier involvement in AI with my projects.
The code provided in the TOA files (TOA.cpp code shown below) already includes the functionality for the actor to say a few words on startup.
// Fill out your copyright notice in the Description page of Project Settings.

#include "TOA.h"
#include "sapi.h"
#include <sphelper.h>
#include <string>


// Sets default values
ATOA::ATOA()
{
	// Set this actor to call Tick() every frame
	PrimaryActorTick.bCanEverTick = true;
	TOAMesh = CreateDefaultSubobject<UStaticMeshComponent>("TOA");

	PitchValue = 0.f;
	YawValue   = 0.f;
	RollValue  = 0.f;

}

void Welcome()
{
	ISpVoice * pVoice = NULL;

	HRESULT hr = CoCreateInstance(CLSID_SpVoice, NULL, CLSCTX_ALL, IID_ISpVoice, (void **)&pVoice);
	if (SUCCEEDED(hr))
	{
		ISpObjectToken* cpToken(NULL);
		SpFindBestToken(SPCAT_VOICES, L"gender=female", L"", &cpToken);
		pVoice->SetVoice(cpToken);
		cpToken->Release();
		hr = pVoice->Speak(L"Hello, welcome to the VR AI Retail Store", 0, NULL);
	}
	pVoice->Release();
	pVoice = NULL;
}

// Called when the game starts or when spawned
void ATOA::BeginPlay()
{
	Super::BeginPlay();
	FTimerHandle TOA;
	TFuture<void> A = Async<void>(EAsyncExecution::Thread, Welcome);
}

// Called every frame
void ATOA::Tick(float DeltaTime)
{
	Super::Tick(DeltaTime);

	FRotator NewRotation = FRotator(PitchValue, YawValue, RollValue);
	FQuat QuatRotation = FQuat(NewRotation);
	AddActorLocalRotation(QuatRotation, false, 0, ETeleportType::None);

}
At this stage you can run the program on your headset. When the program starts, the Actor should say “Hello, welcome to the VR AI Retail Store.”
I discovered that SAPI initially blocked the main application thread so that speech was heard before the VR loaded, as demonstrated in the video below.
Step 8. Resolving the SAPI issue
To prevent SAPI from blocking the main thread, I created the following function to home the SAPI code, provided in the TOA.cpp file above:
void Welcome()
{
	ISpVoice * pVoice = NULL;

	HRESULT hr = CoCreateInstance(CLSID_SpVoice, NULL, CLSCTX_ALL, IID_ISpVoice, (void **)&pVoice);
	if (SUCCEEDED(hr))
	{
		ISpObjectToken* cpToken(NULL);
		SpFindBestToken(SPCAT_VOICES, L"gender=female", L"", &cpToken);
		pVoice->SetVoice(cpToken);
		cpToken->Release();
		hr = pVoice->Speak(L"Hello, welcome to the VR AI Retail Store", 0, NULL);
	}
	pVoice->Release();
	pVoice = NULL;
}
This wrapped everything required for the application to say something into its own function, called Welcome. Next, I replaced the original code with the following, which made an asynchronous call to the Welcome function:
void ATOA::BeginPlay()
{
	Super::BeginPlay();
	FTimerHandle TOA;
	TFuture<void> A = Async<void>(EAsyncExecution::Thread, Welcome);
}
Watch the spoken introduction in the video below.
Contributing
Please feel free to contribute by submitting pull requests. Read contributing.md for details of our code of conduct and how to submit pull requests.
Versioning
I use SemVer for versioning. For the versions available, see Oculus-Examples/releases.
License
This project is licensed under the MIT License- see the License file for details.
Bugs & Issues
I use the repository issues to track bugs and general requests related to using this project.
Conclusion
This first article in the series walks through the steps to go from a blank VR canvas to an actor that will welcome you to your virtual store. Future articles will be added to the series to walk through implementing speech recognition and how communication is handled with a natural language understanding engine.
About the Author
Adam Milton-Barker has more than five years experience in the fields of IoT, AI, machine learning, deep learning, natural language processing/natural language understanding, computer vision, automation, biohacking, basic brain computer interface applications and robotics. In addition, he has spent more than 14 years in hybrid web applications and content management systems, mobile and desktop applications, business administration systems and social media marketing. He uses his acquired skills to provide free information and services for those wanting to learn how to program.
In March 2018 Mr. Milton-Barker joined Bigfinite in Barcelona as an IoT network engineer, working on a team developing and maintaining the core IoT features of their platform.
Since January 2017 he has been an Intel Software Innovator working on projects in the fields of IoT and AI /Machine Learning. His activities have included mentoring hackathons and demonstrating his open source projects at various Intel events around the globe. He also gets to test some really cool tech, as Intel provides him with project support, demonstration opportunities, and hardware/software/platforms. Mr. Milton-Barker is currently involved creating projects that integrate IoT, VR and AI.
In the last five years he has open sourced many of his development projects, including deep learning for detecting breast cancer, an NLU engine, and various computer vision projects. He has also created the iotJumpWay, an IoT PaaS originally meant to be a product but opened for free for developers to learn how to build intelligent automated homes. For more information visit: http://www.AdamMiltonBarker.com.